This is default featured slide 1 title

Go to Blogger edit html and find these sentences.Now replace these sentences with your own descriptions.

This is default featured slide 2 title

Go to Blogger edit html and find these sentences.Now replace these sentences with your own descriptions.

This is default featured slide 3 title

Go to Blogger edit html and find these sentences.Now replace these sentences with your own descriptions.

This is default featured slide 4 title

Go to Blogger edit html and find these sentences.Now replace these sentences with your own descriptions.

This is default featured slide 5 title

Go to Blogger edit html and find these sentences.Now replace these sentences with your own descriptions.

Saturday, January 28, 2012

How to Hide File Behind Images - Steganography

Now you can hide your private files behind images and stay secure from your friends or childrens. This is just a tweak using Command Prompt in Windows7, Vista or XP. Just follow the steps and see images.

1. First Create New Folder. In this folder copy one image (.JPG prefered) behind which you want to hide files.
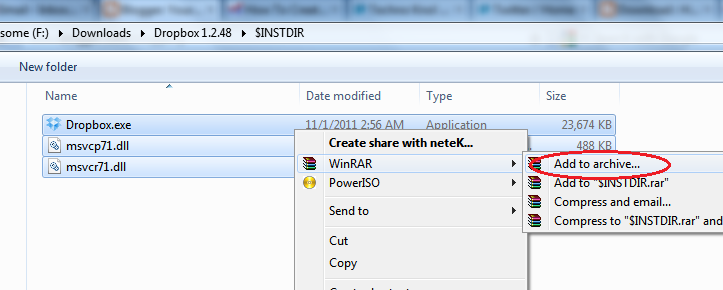
2. Now compress remaining files which you want to hide into .RAR format. Now your folder looks like below.
3. Goto Run > Cmd. Type below command.
copy /b main.jpg + new.rar main2.jpg
(main.jpg = your image)
(new.rar = your compressed files)
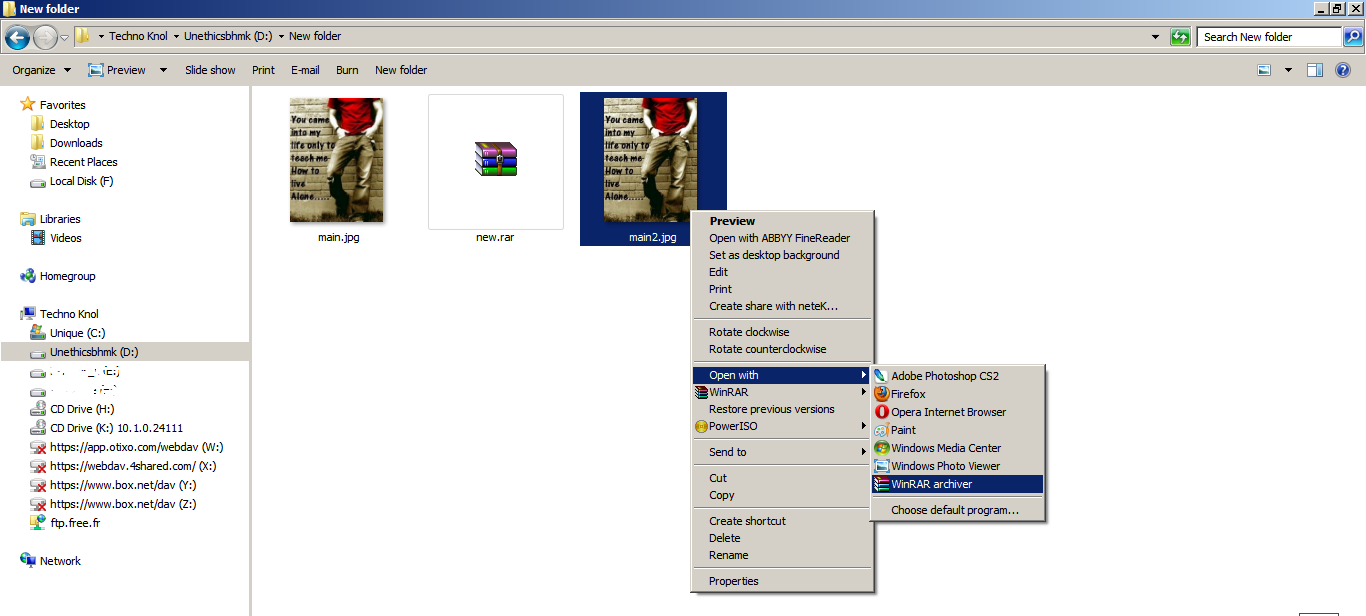
4. In New folder you will see new file main2.jpg. Now open this file in winrar by right clicking and selecting open with > winrar. (Compare the size of main.jpg and main2.jpg, you will understand.)
See main2.rar remains as it is. When hiding behind image.

Enjoy !!! 

How to Extend laptop's Wireless Antenna Range

I’ve been using a wireless Ethernet card in my laptop. But now the change from wired networking to wireless was an amazing shift. Now I could wander around my office or my home and connect to the Web. However, in many situations, I found that the range of the built-in antenna in the PC card was limited, and I desired additional range.

In this tweak I will show you two different and inexpensive ways to increase your laptops wireless LAN card antennas range. In this method we use old coffee can to make our new antenna. With this method we can send and receive data in one direction upto 16 times more powerful than built in antenna in your wireless card. And in another method we will use satellite dish TV antenna. It is highly directional and can send and receive data upto 10 kilometers to another disk in ideal conditions. Here below is Hack 1 - Increase wireless using coffee can.

In this hack you can use 802.11 network card of any brand. You will need 'pigtail' connector to connect wireless card on one hand and 'N' connector on another hand.

You will Need:
  • A metal can : 3 - 3.5 inches diameter and 4 inches long (Metal soup can works well)
  • 4-40 type screw and nuts : Quantity 4
  • 12 Gauge copper wire : 4 inches
  • N style RF connector
  • A pigtail connector that has the proprietary Lucent connector on one end and an N connector on the other
  • Low loss coaxial cable : 30 - 60 feet
  • Drill holes as above
  • Soldering Iron
Process:
1. Take any can that has 3-3.5 inches diameter and equal to or longer than 4 inches and make sure that it's dry and clean and it's open end is free from ragged metal edges.

2.  Now drill a hole from approx. 2.5 inches from closed end of the can for N connector.

3. Now take an N connector and add a short piece of 12 gauge wire such that wire sticks up 1.25 inches from can walls.Now mount the N connector in the can where you have drilled a hole.
N Connector

4. Now open your wireless card and remove cap and connect that pigtail or don't want this pigtail step than open your card and solder a wire to the antenna inside.

5. Now connect soldered wire which is connected to antenna and 12 gauge wire which is connected with N connector. Now you have your wireless card connected with metal can. This metal can works as powerful antenna.


Location of N connector
Now start your laptop and aim open end of the can towards wireless access point or wireless enabled computer. Now note down signal strength and then remove antenna now again measure signal strength. You may see difference because when we attach antenna signal is polarizes in one direction.

WARNING:
Never look into the open end of your antenna when it is operating. Your antenna focuses the signal to levels that could be harmful.


Enjoy!


Friday, January 27, 2012

How to Create Your Own Portable App for USB Drives

There are many sites available on the internet which provides portable apps. But what to do when you can not find a particular app that you want portable version. So here with this easy trick you  can create your own portable app for USB Drives.

Here in my example i'm going to create portable app of Dropbox a cloud service desktop application. You can try your own file but for first time this is recommended before you try on other application.

Download Universal Extractor and WinRAR

For this you need two software one is Universal Extractor and another one is WinRAR. Install both this programs.

Extract any file using Universal Extractor 
Open Uni.Extractor and select a .EXE file you want to create portable. And press OK.


Find your Programs main EXE
Here you have to find a main EXE file in extracted which runs program. Probably it's name will be same as your programs name. Here in my example it's Dropbox.exe and which is in \$INSTDIR\Dropbox.exe 


Create SFX archive
Select all files in that folder and Right Click on it then select Winrar > Add to archive...


When new dialogue box appears Check 'Create SFX Archive' option and in compression method select 'Best'.

Then click on 'Advanced' tab and Click on 'SFX Option'. When new pop-up appears under 'Run After Extraction' box enter your main exe's name. For me it's Dropbox.exe.

Now switch to Mode Tab and check 'Unpack to temporary Folder'. And in Silent mode you can choose anything it affects when you are extracting your portable app. 'Display all' displays all progress, if you choose 'hide all' it works in silent mode none box will appear in screen, it will work in background. I've choosen Display all option.
In the last click on Update tab and under 'over write mode' select 'Overwrite all files'. Then hit OK twice.

You have done, you can see that one exe file will be there. It's your portable app, just copy it to your USB Drive and go any where. Enjoy your own Portable app.